Sunday 6 September 2015

The Swan nebula with a LN300 video camera and a 150mm f/5 AZ Newtonian

A LN300 Video camera fitted with a UV/IR and a Light pollution filter was placed at the Newtonian focus of an f/5, 150P star Discovery AZ GOTO Newtonian telescope. 175 x 10.24s exposures were captured of M17 using SharpCap. 50 x 10.24s dark-frames were also captured. The best 85 frames were de-rotated, dark-frame corrected and stacked with Deep Sky Stacker:

The Omega nebula, M17


 Live view of the nebula in the SharpCap capture software

Thursday 3 September 2015

The dumbbell and crescent nebulae with an LN300 video camera and a Star Discovery 150mm Newtonian

An LN300 video camera fitted with a UV/IR cut filter and a light pollution filter was placed at the Newtonian focus of a Star Discovery, f/5, 150P Newtonian on a Star Discovery AZ GOTO mount.
The camera was set to 10.24s exposures and SharpCap was used to capture unique frames.
140 x 10.24s frames were captured of M27 and the best 84 frames were derotated and stacked in Deep sky Stacker. The resulting image was post processed in Photoshop and Aspect ratio corrected in Nicola Mackin's Aspect Ratio Corrector software.

M27

48 x 10.24s frames of the Crescent Nebula, NGC6888 were captured, derotated and stacked in Deep Sky Stacker. The resulting image was post processed in Photoshop and Aspect ratio corrected in Nicola Mackin's Aspect Ratio Corrector software.

Live view of M27 in the SharpCap program


NGC6888

Desaturated image of the Crescent Nebula

This imaging was done under the glare of a street light within 3m of the telescope. The scope was shaded from direct light from the street light by using an occultation board mounted on a photographic tripod.

The dark shadow cast by the occultation board can be seen cutting off the direct light from the mouth of the telescope. This photograph was taken, handheld in the light from the street light.

This shows the problem that is overcome by the use of the occultation board. The view is from behind a small Newtonian from slightly different angles, showing the street light and its occultation:


In this location the skies are dark with the main problem being direct light from street lights and sometimes security lights.

Monday 24 August 2015

M13 with a 150P Newtonian and an LN300 video camera

A LN300 video camera was placed at the Newtonian focus of a 150P Star Discovery, AZ GOTO Newtonian. The camera was connected to a Windows 10 laptop via a Digital Climax VCap303 capture card. 100 x 2.56s frames were captured of M13 using SharpCap. 100 x 2.56s dark-frames were also captured.The best 90% of frames were dark-frame corrected, registered, derotated and stacked in Deep Sky Stacker. The aspect ratio of the final image was corrected in Nicola Mackin's Aspect Ratio Corrector software. The resulting image was post processed in Photoshop.
A street light shines down onto the spot where I sometimes observe. An occultation board mounted on a photographic tripod shades the scope from the glare of the light and prevents light from the street light directly entering the top of the scope tube and causing internal reflections that ruin the exposures.

M13

The occultation board is simply constructed with a female photographic thread at the base


The occultation board mounted on a tripod showing the offending street light

The occultation board in action, shading the scope from direct street lighting

If the sky is dark, the main objective is to prevent direct light from the street light from entering the top of the telescope tube at an oblique angle. This is the main problem, whilst other ambient light is much less of a problem. When this photograph was taken, there was also a first quarter Moon low in the sky.

Tuesday 18 August 2015

M57 with the LN300 video camera and the 150mm Newtonian on a Star Discovery AZ GOTO mount

The LN300 video camera was placed at the Newtonian focus of the Star Discovery 150P, f/5 Newtonian. The camera was connected to a Windows 10 laptop via a Digital Climax VCap303 capture card. 300 x 5s exposures of M57 were captured using SharpCap. 100 x 5s dark-frames were also captured. The best 240 exposures (20 min total exposure) were dark-frame corrected, registered, derotated and stacked in Deep Sky Stacker. The resulting image was post processed in Photoshop:
M57


The live screen view was pleasing and shows that this is very suitable for viewing and sharing the view as an electronic, deep sky eyepiece.

Live View whilst capturing in SharpCap


Wednesday 12 August 2015

M27 with 5s video frame exposures with a LN30 video camera and a 150 mm, f/5 Newtonian

The LN300 video camera was fitted with a Baader UV/IR rejection filter and placed at the Newtonian focus of an AZ GOTO, 150 mm, f/5. Newtonian. The camera was set to SENS OFF (frame accumulation) and LENS shutter exposure of 256 x 1/50s = 5.12s. The camera was connected to a Windows 10 laptop via a Digital Climax VCap303 capture card. SharpCap was used to capture 100 frames, one frame every 5s. Similarly, 100 x 5s dark-frames were captured. The best 90 frames were registered, derotated and stacked in Deep Sky Stacker, post processed in Photoshop and finally aspect ratio corrected in Nicola Mackin's Aspect Ratio Corrector software:


Live view of the computer screen with SharpCap

The live view was very pleasing and would be good for star parties or sharing viewing.

Click on Older Posts to read more of this Blog

Tuesday 11 August 2015

Long exposures with the LN300 frame-integrating video camera

The Star Discovery AZ, GOTO mount with a Star Discovery 150 mm, f/5 Newtonian was use with the LN300 video camera fitted with a Baader UV/IR rejection filter to image M17.
In this experiment the SENS was turned off so that the camera was not accumulating frames. The AGC was set to low and the LENS control which controls shutter exposure, was set to x 256 of the normal shutter exposure of 1/50s per half frame. This gives an exposure of 5.12s. It should be noted that the shutter speed function changes by factors of 2 in the same way to that of the SENS frame accumulation. This camera can go to 20s with a factor of x 1024.
The camera was connected to a Windows 10 computer via a Digital Climax VCap303 capture card.
SharpCap was used to capture frames from the camera at a rate of one frame per 5 seconds and the frames were saved as PNG files. 100 x 5s frames were captured along with 50 x dark-frames.
The frames were dark-frame corrected, de-rotated and stacked in Deep Sky Stacker, stacking the best 80% of the frames.
The resulting image was post processed in Photoshop:

M17


In the absence of any user documentation, the functions of the camera are having to be deduced by experiment.
Using the settings above, the camera produced a very pleasing live display which will be very useful for star parties when a small video monitor will be used to display the image rather than a computer.

Sunday 9 August 2015

First light for a low cost frame-accumulating video camera and a Star Discovery AZ GOTO, 150 mm, f/5 Newtonian

The camera is a low cost (about £45) LN300, frame accumulating video camera producing composite video output.

LN300 video camera
The camera is seen here fitted with a scope adapter and a Baader UV/IR cut filter.

Five buttons on the back control the camera functions via an On Screen Display


The camera was connected to a laptop via a Climax Digital VCap303 capture card as shown in a previous blog. 50 x 5s integrated frames of M17 were captured using SharpCap capture software. I used similar setting to those I would have used with a Mintron with SENS = 256. The software was set to capture a frame every 5 seconds and to save the frames as PNGs.
The LN300 camera was placed at the Newtonian focus of a Star Discovery AZ, 150 mm, f/5 Newtonian system:

150 mm, f/5 Star Discovery, f/5 Newtonian

The best 40 frames were stacked in Deep Sky Stacker, which derotates before it stacks the images. This is essential with an AZ mount. The resulting 16 bit Tiff file was post processed in Photoshop:

M17

Diffraction spikes, accentuated by the sturdy spider can be seen in the image. I rather like diffraction spikes, so the spider is no problem to me.

The LN300 camera has some fundamentally different features to the Mintrons and Samsung frame-accumulating video cameras. One such feature is the ability to slow the shutter speed below the standard 1/50s per half frame. It is not immediately clear how this actually works, but seems to increase the exposure as would be expected, even when the SENS (frame accumulation) is turned off. This is a feature that will be explored in future experiments, but the implication is that there is a distinction between the frame accumulation (In Steve Massey's terminology) and length of individual frame integration.
This has been a successful first light for the new, portable system.

Click on Older Posts to read more of this blog

Thursday 6 August 2015

A camera needs a lens. I this case, a 150mm f/5 Newtonian

I have obtained an ideal portable system for use with deep sky astrovideography in the field. The new Skywatcher Star Discovery mount with Synscan 4 and Freedom find (allowing manual movement of the scope without losing alignment. The scope with the mount is the 150P f/5 Newtonian. The mount is a more robust version of the AZ Synscan mount that carries the 130mm Newtonian or the 127mm Maksutov. The quick release knob allows for easy movement of the scope in altitude:


The collimation screws are hidden behind a cap so it is hard to accidentally change collimation. The scope arrived in perfect collimation as checked by two laser collimator systems working on different principles.


The spider is thick and will most likely produce prominent diffraction spikes on the brighter stars.


This is the portable system that I shall be using with a frame integrating video camera to image deep sky objects in the field. Being an altazimuth mount is not a problem as each frame integrated exposure will be short enough for there to be no image rotation within an exposure, and between exposure image rotation can be dealt with by Deep Sky Stacker during the stacking process.

First light was achieved by putting a DMK camera at the Newtonian focus. Images of the Ring nebula and the Swan nebula were obtained:

Ring nebula with a DMK

Swan nebula with a DMK

The next day, a Mintron 22S85HC-EX Mintron monochrome frame-integrating video camera with a 1/2" sensor was placed at the Newtonian focus and DVD was recorded at high quality of M17, the Swan nebula and M27, the Dumbbell nebula and M20, the Trifid nebula. The individual BMP frames were extracted from the DVD VOB (Video object) files using Ian Davies's Vob Frame Extractor set to extract a unique frame every 256th frame from the VOB and save the BMPs. The BMPs were stacked in Deep Sky Stacker which derotates the image before stacking them. The resulting 16 bitTiff file was post processed in Photoshop and then the aspect ratio was corrected using Nicola Mackin's Aspect Ratio Corrector software:
M17 with a Mintron

The larger sensor of the Mintron produces a wider field of view

M27 with a Mintron

Images of M27 stacked in Registax with no derotation, clearly show image rotation. This is why it is important to stack with Deep Sky Stacker when using an AZ mount.

M20, the Trifid nebula

Click on Older Posts to read more of this blog

Sunday 28 June 2015

UTC control for the Samsung

UTC (Up The Coaxial) control is possible for the Samsung SDC-435 and SCB-2000 which can be controlled remotely using the hand controller. This is an advantage when using the camera with a telescope, particularly when using a less robust tripod, such as those supplied with low cost AZ GOTO systems.

The Samsung SDC-435 being controlled by the UTC hand controller

UTC hand controllers can be quite expensive. However, it is possible to buy really cheap controllers on Amazon. I paid about £8 for the controller shown which allows full control of the camera without having to touch the buttons on the back of the camera.

The next experiments will be with a low cost AZ GOTO system using the UTC controller.

Click on Older Posts to see more of this blog

Tuesday 23 June 2015

35% waxing, crescent Moon with a monochrome CMOS USB camera

An Opticstar PL-130M monochrome, USB CMOS camera was placed at the prime focus of a 127 mm Maksutov and six, 500 frame AVIs were captured of overlapping areas of the 35% waxing, crescent Moon. The AVIs were stacked and wavelet processed in Registax 5 and they were combined into a single image in Photoshop.


Please use the scroll bars to see the whole image

Click on 'Older Posts' to see more of this blog

Thursday 18 June 2015

Solar imaging with an Opticstar PL-130M monochrome CMOS camera in H-alpha light

The Opticstar PL-130M monochrome CMOS camera is a relatively low cost USB Imaging device that is marketed as a solar system camera and auto-guiding camera. It is very sensitive and I used a ND13 neutral density filter as well as an IR/UV cut filter and placed the camera at the prime focus of a Solarmax ll 60 BF15 H-alpha scope. (If a PST is to be used, then a Barlow lens should be screwed onto the nose-piece, as the scope doesn't have enough back focus). Two 1500 frame AVIs were captured at 8fps using SharpCap 2.5; one exposed for the disk and the other exposed for the prominences. The two AVIs were stacked in Registax 5 and the two resulting images were combined and colourised in Photoshop:


A monochrome camera is ideal for imaging in H-alpha light, which is monochromatic light at 656.28 nm. A monochrome camera has higher spatial resolution than a colour camera. The colour is added at the end of the process for cosmetic purposes to represent the wavelength of light used for the capturing. This camera has a 1/2" monochrome 1.3 mega-pixel CMOS sensor which is large enough for the whole of the solar disk to fall on the sensor. This makes the camera suitable for whole disk imaging.

Click on Older Posts to see more of this blog

Wednesday 17 June 2015

Testing a £2 webcam as a possible starter camera for solar system imaging

I purchased this camera from Amazon for £2
As a webcam, it is quite good and would probably give a good result for video conferencing and video chat. The reason is that it has on-board compression that allows for a smooth video transmission. Artifacts are hardly noticeable due to the motion of the video. Unfortunately, the on-board video compression cannot be disabled and that leads to problems with solar system imaging. The camera has a standard 12 mm webcam/security cam lens thread. This means that a standard webcam telescope adapter can be fitted direct with no further remounting required. The camera required no drivers and worked well with Windows 8 and with Linux Lubuntu.

For First light the camera was placed at the prime focus of a Solarmax ll 60 BF15 H-alpha scope and the Sun was imaged.


These were encouraging first light images, obtained by capturing 500 frame AVIs and stacking them in Registax 5.

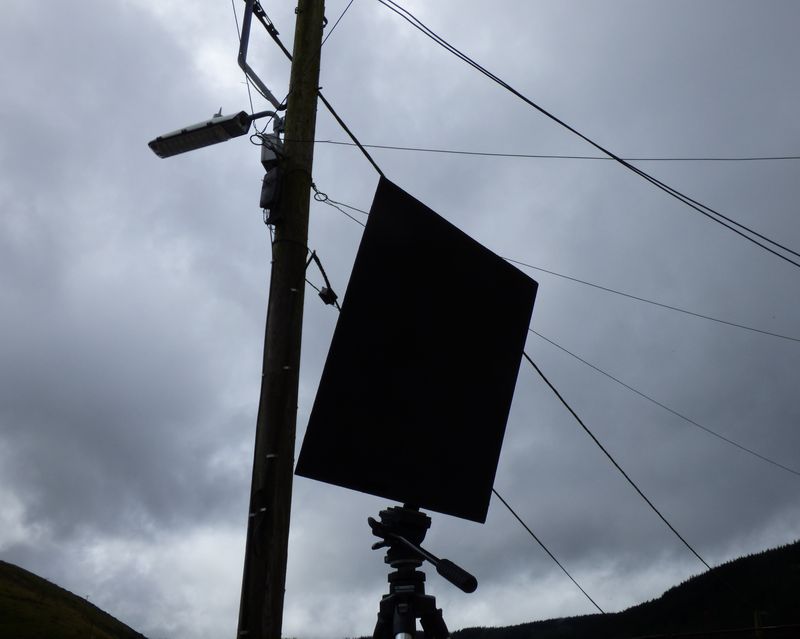
The camera was then set up in an afocal configuration as this one has a standard 1/4" photographic female thread on its Base.

The camera was attached to a 127mm Maksutov with a 20mm eyepiece and two overlapping AVIs of the Moon were captured. The AVIs were stacked in Registax 5 and the resulting images combined in Photoshop. This could also have been done with the Freeware, Microsoft ICE (Image Composite Editor). The result was an encouraging image of the Moon:


The camera functioned quite well as an electronic eyepiece using the Laptop as a viewer.

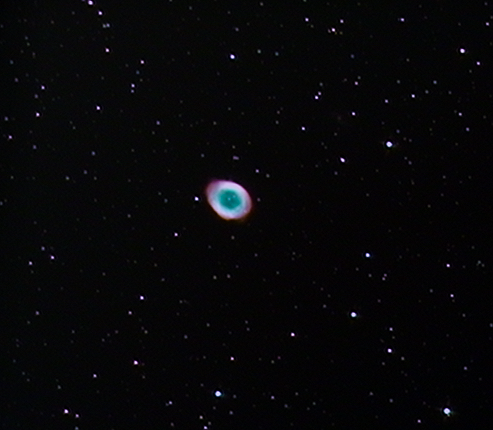
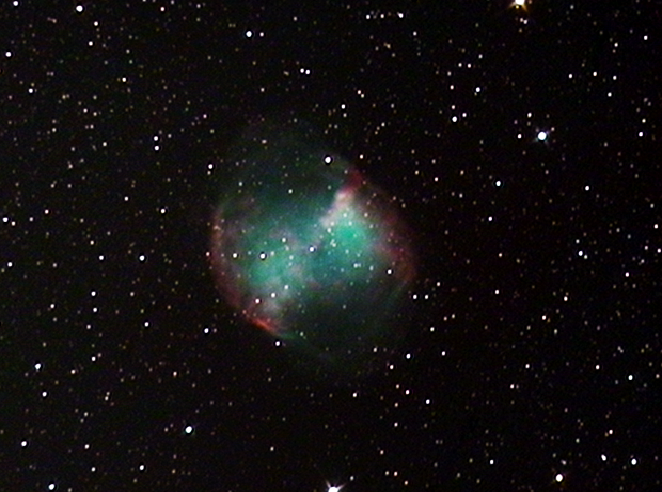
The camera was then placed at the prime focus of the 127 mm Maksutov:
Again, it served quite well as an electronic eyepiece, but at this magnification, compression artifacts started to show and they were obvious in the images produced by stacking the AVIs in Registax.

The camera was also used to capture an AVI of Jupiter.


Whilst this camera can in no way be considered to be suitable for serious imaging of the solar system, it is worth it for someone wishing to make a stab at imaging without having too high expectations before they spend significant amounts of money on a more expensive imager. It is adequate as a low end electronic eyepiece. The burden of the device is the built in video compression that makes it so suitable as a video conferencing device.
I would say that if a person lacks the confidence to invest in a better device, this one will enable them to get some introductory experience that will help them to decide whether solar system imaging is for them.

Click on Older Posts to see more of this blog

Thursday 4 June 2015

The best of both adapter worlds with the £12-80, 1000 TV lines, colour TV camera

Today, I removed the sliding IR cut/ plain glass filters from the lens holder and re-attached the lens threads to the circuit board.


There is a small spring-loaded arm activated by the brightness of the light that slides the IR cut filter in front of the sensor in bright light, and slides the plain glass filter in front of the sensor in dim light.


With both of these removed, the lens threads were then re-attached to the circuit board beneath the C/CS thread aperture:


This allows for either a webcam adapter or a C/CS adapter (1.25" OR 2") to be used with the camera.

Back view

Side view

The box with the power/signal cable

Being a colour camera, it is most suited to lunar and planetary imaging. An IR cut filter is required if a scope other than a Newtonian is used because visible and IR light come to slightly different foci and produce a soft focus if an IR cut filter isn't used with a refractor. The original IR filter can be left in place if the filter slider is disabled.

I do however, intend to remount the circuit board in a smaller, black project box to produce a neater finished camera.

Click on Older Posts to see more of this blog